4足歩行ロボットSpotの自動運転プログラム作成
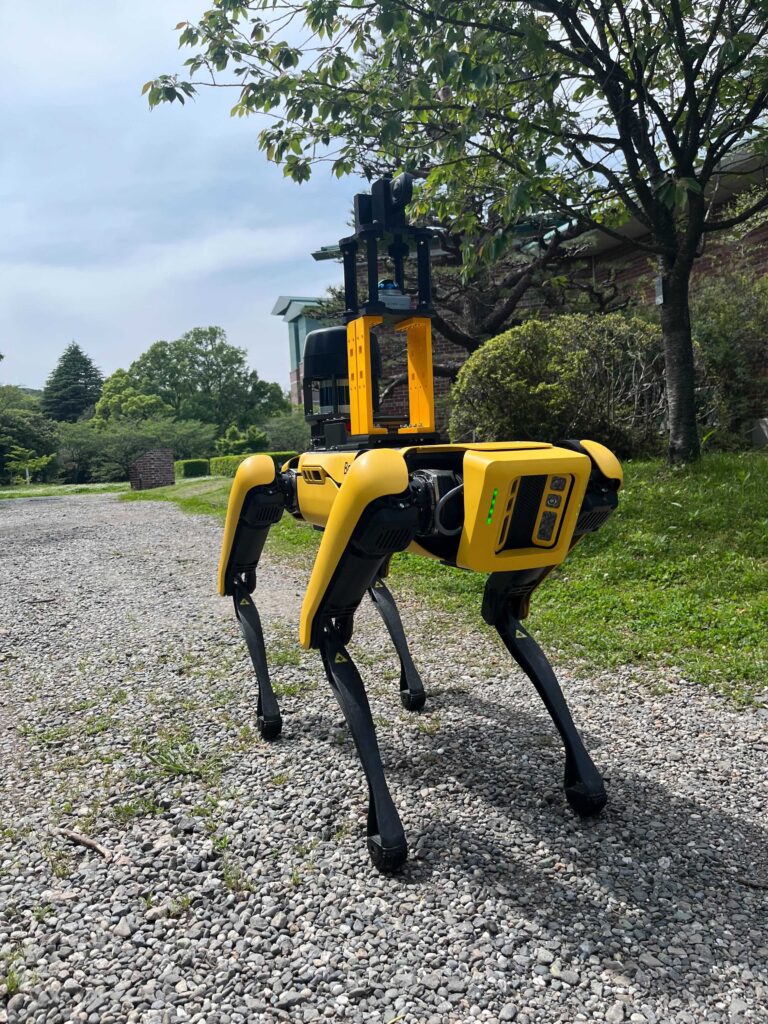
Boston Dynamics社が開発を行った、4足歩行ロボットSpotの自動運転をタブレットからではなくPCから行うことができるようになりました。自動運転プログラム作成にあたり、自動運転時のスピード制御や、自動運転中に他の動作を行うことも可能となりました。
(自動運転時の様子はYoutube動画からご覧ください : おじぎをするspot君 (youtube.com))
実行環境
(PC,Spot環境)
- spotソフトウェア – v3.3.0
- Python – 3.8.5
(pythonモジュール環境)
- bosdyn-client – 3.3.0
- bosdyn-mission – 3.3.0
- bosdyn-choreography-client – 3.3.0
Spot自動運転プログラム説明
Spotの自動運転を行うにあたって、以下の流れで実装を行う必要があります。
- Spotに接続
- 権限をPCに付与
- ウェイポイント,エッジのリスト取得
- ルートの始点にSpotを移動
- Spot自動運転開始
この中で、自動運転に最も関係する3~5の解説を行います。
(今回のプログラムを作成するにあたり、spot-sdkのgraph_nav_command_line.pyという自動運転動作をコマンドライン化したプログラムを参考にしました。GraphNav and Recording Service Command Line Interfaces — Spot 4.0.1 documentation (bostondynamics.com))
3. ウェイポイント,エッジのリスト取得
そもそもSpotにおけるウェイポイントとは、自動運転ルートを作成した際に自動的にルート上に振られるポイントであり、エッジとはそれらのウェイポイントをつなげてポイント同士の対応関係を表したものです。
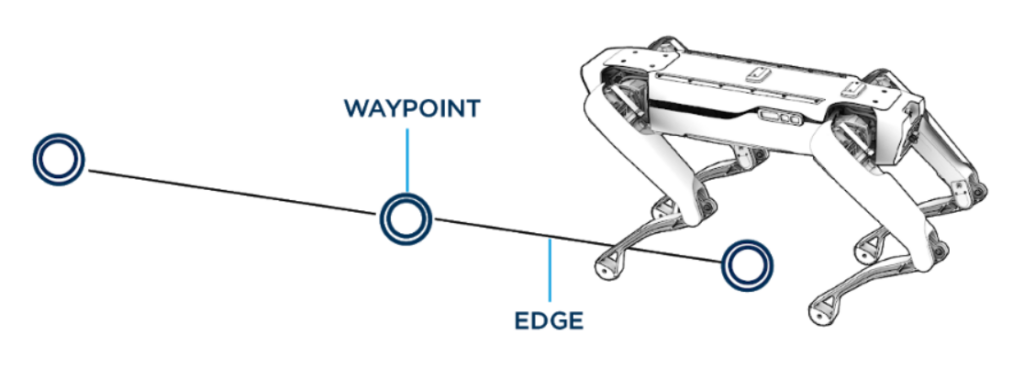
Autonomyの技術概要 — Spot 4.0.1 ドキュメント (bostondynamics.com)
まずはそのSpotに保存されている最新のウェイポイントとエッジをプログラムにより取得する必要があります。
以下が実際のウェイポイント,エッジのリスト取得関数です。
    # グラフのウェイトポイントIDとエッジIDをリストアップ
    def _list_graph_waypoint_and_edge_ids(self, *args):
        """List the waypoint ids and edge ids of the graph currently on the robot."""

        # 最新のマップを取得
        graph = self._graph_nav_client.download_graph()
        if graph is None:
            print('Empty graph.')
            return
        self._current_graph = graph

        # 現在のロボットの位置を取得
        localization_id = self._graph_nav_client.get_localization_state().localization.waypoint_id

        # ウェイトポイントとエッジのリストを更新(そして表示)
        self._current_annotation_name_to_wp_id, self._current_edges, self._waypoint_all = graph_nav_util.update_waypoints_and_edges(
            graph, localization_id)
まず、Spotに保存されている最新の自動運転マップをdownload_graph関数にて取得します。しかし、取得したデータはリストであるため、取得したいウェイポイントとエッジを抽出する必要があります。そこで、graph_nav_command_line.pyがインポートしているgraph_nav_util.pyのupdate_waypoint_and_edges関数を用いて、現在のSpotのいるエッジと、ウェイポイント一覧を作成順に並べたものを取得します。
4. ルートの始点にSpotを移動
ウェイポイントとエッジのリストを取得できたためSpot自動運転を行いたいのですが、今回用いる関数では現在Spotのいる位置からルートをスタートしてしまい、全てのルートを移動することができません。そのため、Spotを自動運転ルートの始点に移動させる必要があります。
以下が実際のSpot始点移動関数です。
    # 始点に移動
    def _navigate_to(self, *args):

        # 移動先のウェイポイントを指定
        destination_waypoint = self._waypoint_all[0]

        if not self.toggle_power(should_power_on=True):
            print('Failed to power on the robot, and cannot complete navigate to request.')
            return

        nav_to_cmd_id = None
        # Navigate to the destination waypoint.
        is_finished = False
        while not is_finished:
            # Issue the navigation command about twice a second such that it is easy to terminate the
            # navigation command (with estop or killing the program).
            try:
                nav_to_cmd_id = self._graph_nav_client.navigate_to(destination_waypoint, 1.0,
                                                                   command_id=nav_to_cmd_id)
            except ResponseError as e:
                print(f'Error while navigating {e}')
                break
            time.sleep(.5)  # Sleep for half a second to allow for command execution.
            # Poll the robot for feedback to determine if the navigation command is complete. Then sit
            # the robot down once it is finished.
            is_finished = self._check_success(nav_to_cmd_id)

        # Power off the robot if appropriate.
        if self._powered_on and not self._started_powered_on:
            # Sit the robot down + power off after the navigation command is complete.
            self.toggle_power(should_power_on=False)
この関数で用いているnavigate_to関数は、指定したウェイポイントと、関数実行時間を引数とすることで、指定したウェイポイントまでSpotを自動で移動させることができる関数となっています。これによりSpotを自動運転ルートの始点へと移動させることができます。
5. Spot自動運転開始
自動運転を行う準備がすべて完了したため、ついにSpot自動運転を始めたいと思います。
以下が実際のSpot自動運転開始関数です。
    # ルートを移動
    def _navigate_route(self, *args, max_x, max_y, max_yaw):

        # spotの最大スピード決定
        speed_limit = geometry_pb2.SE2VelocityLimit(
        max_vel=geometry_pb2.SE2Velocity(
        linear=geometry_pb2.Vec2(x=max_x, y=max_y),
        angular=max_yaw))

        # navigate_route関数の引数パラメータ作成
        params = self._graph_nav_client.generate_travel_params(
        max_distance = 0.5, max_yaw = 0.5, velocity_limit = speed_limit)


        waypoint_ids = self._waypoint_all # ウェイポイントのリスト
        print(waypoint_ids)
        edge_ids_list = [] # エッジのリスト
        all_edges_found = True
        # Attempt to find edges in the current graph that match the ordered waypoint pairs.
        # These are necessary to create a valid route.
        for i in range(len(waypoint_ids) - 1):
            start_wp = waypoint_ids[i]
            end_wp = waypoint_ids[i + 1]
            edge_id = self._match_edge(self._current_edges, start_wp, end_wp)
            if edge_id is not None:
                edge_ids_list.append(edge_id)
            else:
                all_edges_found = False
                print(f'Failed to find an edge between waypoints: {start_wp} and {end_wp}')
                print(
                    'List the graph\'s waypoints and edges to ensure pairs of waypoints has an edge.'
                )
                break

        if all_edges_found:
            if not self.toggle_power(should_power_on=True):
                print('Failed to power on the robot, and cannot complete navigate route request.')
                return

            # Navigate a specific route.
            route = self._graph_nav_client.build_route(waypoint_ids, edge_ids_list)
            is_finished = False
            # 終点に到達するまで移動

            while not is_finished:
                # 指定したルートをcmd_duration秒の間移動
                nav_route_command_id = self._graph_nav_client.navigate_route(
                    route, cmd_duration=0.5, travel_params = params)

                # 終点に到達したかの確認
                is_finished = self._check_success(nav_route_command_id)


            # Power off the robot if appropriate.
            if self._powered_on and not self._started_powered_on:
                # Sit the robot down + power off after the navigation command is complete.
                self.toggle_power(should_power_on=False)
自動運転はnavigate_route関数に移動するルート順にウェイポイントを並べた配列と、関数実行時間を入力することによって行います。
この時、navigate_to,navigate_route関数の連続で呼び出すという特性上、自動運転を指定秒行ったあとに何らかの操作(屈伸運動や撮影など)を行いまた自動運転を始めるといった動きも可能となります。
また、Spotの自動運転速度を遅くする場合には、navigate_route関数の引数にtravel_paramsを追加します。これは、Spotの最大移動速度を指定することができ、安定した移動を考えると、最も遅いスピードで13cm/sでの移動設定が可能となります。
以下は実際にSpotを自動運転させ、スピードを変化させた際の比較動画となります。
まとめ
今回は、Spotの自動運転に加え、運転時のスピード調整、自動運転中の他の動作の実装を行ってきました。
これからの構想としては、今回実装した機能を用いて、Spotに点群取得装置を載せ、自動運転中に屈伸運動を行いより高所の点群を取得したり、THETAを乗せ、遅いスピードでの自動運転中に全天球画像の撮影を行うなどといったことを考えています。
また、進展があり次第ブログにSpot情報を載せていきたいと思います。